
Plus - A Very Cool Trick You Will LOVE!

Oh, yeah. I remember now.
They're right here in the Living Room.
You know - by the front door.

Or at least they WILL be.
When they're totally finished.

Before you ask,
YES. This is yet another
almost finished project.

I am still deciding on whether
to paint over the guidelines...
or to leave them.
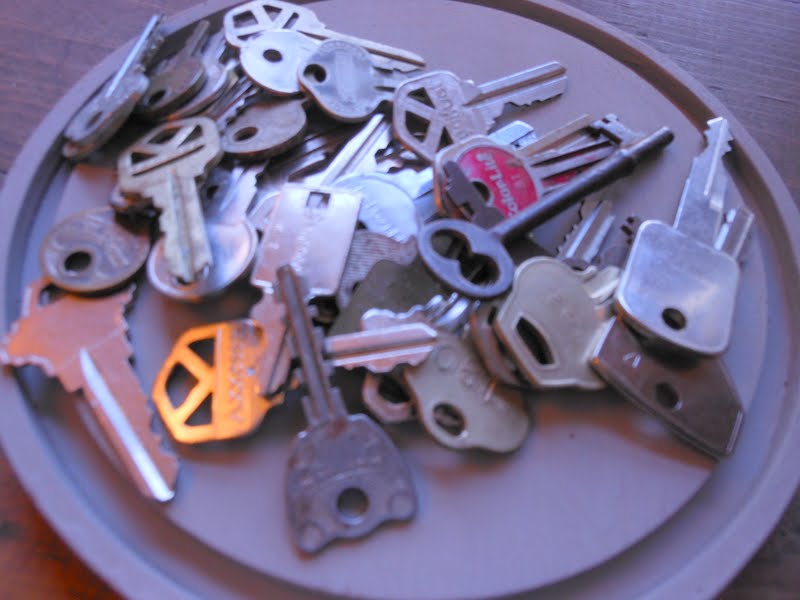
And now, I need more old keys.

But let me start at the beginning.

I bought this years ago and
stuck it in the garage.
It's a nice old wooden cabinet door.
It only cost a couple of dollars in
a store that sells used and odd lots
of building materials cheap.
Then I saw this on Pinterest.

It's from Vintage Junky. LOVE HER!
So I pinned it and planned to do it.
I don't have an alligatored wood panel,
but I DO have a can of ASCP French Linen.
And a bunch of keys.
After my garage cleaning and sale
a couple of weeks back, I brought
the door and a few more things inside.
I slapped a coat of French Linen
on the cabinet door panel.
Fast Forward to Sunday...
The hardest thing about this project was
deciding how far apart to put the keys,
and properly spacing them so it didn't
look like I did it after a couple glasses of wine...
But I dusted off a few brain cells and
remembered a very cool trick from
college design class...you will LOVE IT!
NO MEASURING - well not much.

To evenly space a grid or stripes,
say for a wall or something,
You need a measuring tape longer than
your area. And it would be useful
to have a plexi glass right angle.
Here's my ancient from back in school.
It's broken, but still useful.

And you need a pencil.
First, decide how many equal spaces into
which you would like your space divided.
For illustration purposes, I have
used a 3" square, which I
want to divide into three equal parts.
Let's call it an 18" square.
Of course, real life is
never this neat! But the principle works.
Find a number that is divisible by 3.
(or 4 or 5 or whatever your number is.)
On one side of your surface, begin at 0.
Working as diagonally as necessary,
line up your measure at the number you found.
For our 18" square, 21 would be a good choice.
0 is on one edge, and 21 is on the other.
It does not matter where it ends up.
Only the horizontal lines matter.

So at 7, and at 14, I make marks.
Those numbers are indicated
by where the dotted lines intersect the
solid line with the arrow.

lines where you made the marks.

TO make a grid, just do the same thing
on the other sides of the rectangle.
This is MUCH simpler than
calculating fractions of inches.
I just hammered tiny nails
where my grid lines intersected
And hung my keys on them.
Hint: If you try this, make sure you
attach your hanger on the back first!
Now, will I leave the grid lines?
I think so. And I'll tweak the nails a bit,
and add a hanger. In any event,
I'll show you the finished, styled
thing before too long, I promise!
Word for the Day:
Matthew 16:19
I will give you the keys of the kingdom of heaven, and whatever you bind on earth shall be bound in heaven, and whatever you loose on earth shall be loosed in heaven.”
I will give you the keys of the kingdom of heaven, and whatever you bind on earth shall be bound in heaven, and whatever you loose on earth shall be loosed in heaven.”
|
Linking With
|
|
|
Sunday
|
|
|
Sunday’s Best
|
|
|
Creative
Bloggers Party Hop
|
|
|
Nifty
Thrifty Sunday
|
|
|
Monday
|
|
|
Metamorphosis
Monday
|
|
|
Masterpiece Monday
|
|
|
Make it Pretty Monday
|
|
|
Tuesday
|
|
|
Vintage Inspiration
Tuesday
|
|
|
Nifty
Thrifty Tuesday
|
|
|
Cowgirl Up!
|
|
|
Cowgirl Up!
|
|
|
Cowgirl Up!
|
|
|
Wednesday
|
|
|
Blissfully
White Wednesday
|
|
|
Wow
Us Wednesday
|
|
|
What’s it Wednesday
|
|
|
Primp
Your Stuff Wed
|
|
|
Thursday
|
|
|
Under
$100 Link Party
|
|
|
Share
Awesomeness Thursday
|
|
|
Time Travel Thursday
|
|
|
Treasure
Hunt Thursday
|
|
|
Home
and Garden Thursday
|
|
|
Share
Your Cup Thursday
|
|
|
Doin’
It Yourself
|
|
|
Friday
|
|
|
Feathered
Nest Friday
|
|
|
Potpourri
Friday
|
|
|
Frugal
Friday
|
|
|
Inspiration
Friday
|
|
|
Vintage
Inspiration Friday
|
|
|
Rustic
Restorations Weekend
|
|
|
Frugalicious
Friday
|
|
|
Fabulously
Creative Friday
|
|
|
Saturday
|
|
|
Saturday
Nite Special
|
|
|
Get
Schooled Saturday
|
11 comments:
I love this project! I like the visible pencil lines!
Love it!! I never knew how artsy keys could look. Don't you love it when you finally find a purpose for the things you stash away? Great repurposing job!!
Very fun project! Such a great way to display old keys!! Thanks for sharing!
I saw this on Pinterest, too. Very clever! Of course you would have that many keys. :)
This is the coolest thing, Revi!! I'm so glad you shared this project. I've got plenty of old keys at the shop.....and I come across old wooden pieces all the time. Definitely making this project soon. Love it :)
Loi
Love this idea, great tips!
Great idea. I love the look of hotel keys, and yours looks great!
I know how hard it is to measure and hang all those hooks perfectly that would have taken a lot of time and patience! Great job :)
Love this idea, Revi! I also can imagine it with vintage skeleton keys! Too much fun! Thanks so much for sharing on Blissful Whites Wednesday!
Hugs,
Becky
What a great collection of keys! Thank you so much for linking this up to Rustic Restorations Weekend!
What a super-fun display! Your keys are fabulous!
Thanks for sharing!
hugs ~ Crystelle
Post a Comment